What is each part on a road bike called?


What are the parts to a road bike test

  1. To move your chain into the small and large chain ring, you will need to use the left _________ to make this change.  When you make this adjustment the _______   __________ moves to make the chain move from the small and the large chain ring.  

  2. If your chain comes off your need to push the __________________ forward to assist with reducing tension so you can put the chain back on easier.  

  3. To be ‘down in the drops’ your hands need to be on the bottom of the _________________ 

  4. Your cleats on the bottom of your shoes slot into the ______________   

  5. When you select the right gear lever the chain moves up and down the _______________   located on the back wheel.   This makes the gears change.  The part of the bike responsible for making the chain move up and down is called the _________    ____________   

  6. When you are doing single leg drills and you notice a clunking noise coming from you bike.   This noise is coming from the __________ . This is due to either incorrect pedaling (non-circular) or having the bike in the wrong gear, usually a gear far too easy.  

  7. To take the front wheel off, first you must loosen the _________    ____________ first.  Then you can remove the front wheel from between the ________’s and the __________’s  

  8. You sit on the   ____________.   The tube underneath this is called the ________  __________.  This joins into four tubes, called the _______  ________, the ________   _________ and the ______________’s.  One of these is hidden in the diagram but has the same name.    You may need to look at your actual bike to identify this. 

  9. The silver or carbon area that comes into contact with the brake pads to slow the bike is called the ________.  (not the case with disc wheels).  

  10. The tube along the top of the bike that runs parallel is called the _____ _________. 

  11. During a bike fit, If a bike needs to adjusted so the handlebars are closer, you can replace a particular bike part to be shorter.   This part is called the _______.  This is often common for women to have a shorter one, due to having longer legs and shorter torsos, than men.   The same goes for people that have longer torsos, you can also get much longer parts to accommodate torso height.   

  12. The tube in which the bottle cage is attached to is called the ________   __________. 

  13. When you clean your bike you should ensure you degrease and re-oil your ______ .  By doing this you ride more efficiently, it helps to take care of your bike, and it stops it from rusting.  Another bonus is, if you change your tire, you won’t have black all over your hands.   Clean bikes are fast bikes.  

HOW TO DOWNLOAD A TRAINING PEAKS WORKOUT TO ZWIFT

Scroll down for the printable PDF on how to download a training peaks session to Zwift

 HOW TO DOWNLOAD A TRAINING PEAKS WORKOUT TO ZWIFT

Unfortunately, ZWIFT and Training peaks don’t automatically talk to each other.

 You need to give ZWIFT a helping hand by downloading the training peaks files.  Its pretty easy once you get into the swing of it.

First you need to ensure your ZWIFT and TRAINING PEAKS is linked.   If you have already done this, please skip to down to HOW TO DOWNLOAD A TRAINING PEAKS WORKOUT TO ZWIFT

HOW TO SYNC ZWIFT TO TRAINING PEAKS

Log into ZWIFT.COM on a desktop computer, you can not do this in the app.

Please ensure you are logging into the actual website and SIGN IN using your normal log in detail for Zwift.

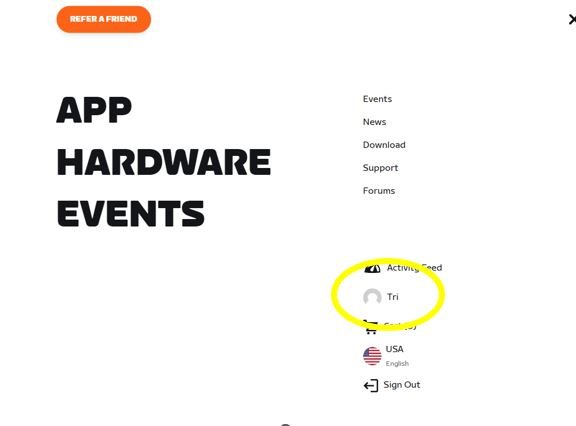
On the right you will see a drop-down hamburger menu.   

The next step is to connect, this part is a little trickier to find… click on YOUR NAME 


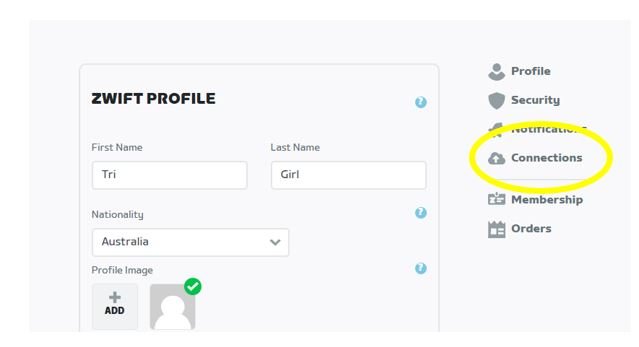
Click on CONNECTIONS

 You will see an area – CONNECT YOUR ACCOUNTS.  Scroll down to add TRAINING PEAKS to your connections, you will have to log into your training peaks account to do this.  Once its connected, CLOSE ZWIFT DOWN COMPLETELY.  (important)

 HOW TO DOWNLOAD A TRAINING PEAKS WORKOUT TO ZWIFT

First on your desktop computer, familiarise yourself as to where your ZWIFT FILES are kept.  Every computer that has the ZWIFT program has this on it somewhere.  Normally its under my This PC, documents (or files on a mac) and under a folder simply called ZWIFT.

 Open the WORKOUTS FOLDER

 You will see inside that folder you have a unique ID number, in this case it is 4915421.

If you open it, you will see the rides you have downloaded.  They are called ZWO files.  This could also be empty, don’t worry if it is.

 Now remember where that folder, is – you are going to need it soon. Or even better, keep it open

LOG INTO Training Peaks

Go to the session that you are trying to sync to your Zwift session.  You can download these in advance also.    The sessions that CAN be downloaded are ones that your coach has built.  What does that mean???  If you see some blue bars at the top of your session, these are the ones that can be downloaded.    You will also see a download icon, this is only available for sessions ‘built’  by your coach’, if it hasn’t been built, you can not download it and the little download icon will not be present.

Click the DOWNLOAD ICON  (highlighted)

 click on the ZWO icon highlighted.

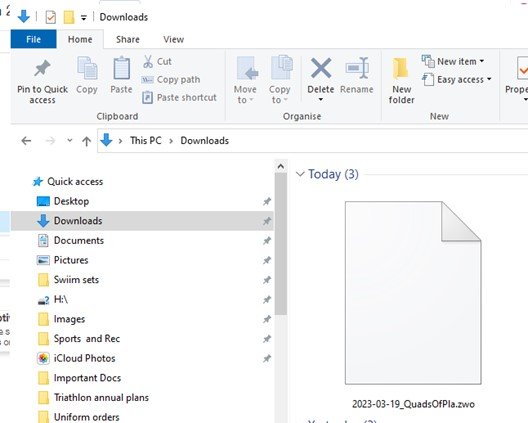
Go to your normal DOWNLOADS folder, right click to COPY the file you have just downloaded

Go to you ZWIFT ID FOLER where you WORKOUTS are, (the folder we talked about earlier)  and PASTE the workout.

Now OPEN your ZWIFT on the device you are using for training, it might need some time to update while it syncs the new workout/s

Go to MENU

Click WORKOUTS

BINGO!!  Training Peaks Workouts will now appear, and you should find the session for the day there!  Click Do WORKOUT and you are done!  Happy Training!


 Download the PDF here: How to download a training peaks session to Zwift?